Mission 10


Hiya guys!  The new mission “Waddle Squad” has been released. Here are the mission cheats and walk-through guide for this mission.


Firstly, here is the video for the Mission 10 Waddle Squad Walkthrough!!


Here is the step-by-step tutorial and cheats for the Mission 10- Waddle Squad!!


Begin the mission by talking to G and the other agents.


When Herbert and G are finished talking, look right next to G and grab the solar source out of the Brown box and put it in your inventory.


Go to the Gift Shop and talk to the Green penguin.


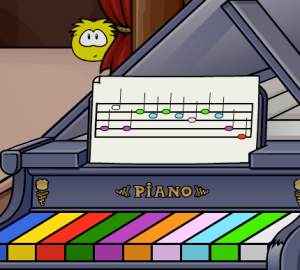
Scroll to the right and talk to Rookie and take the solar box out of your inventory and put it on the colored wires. Use the soldering iron to make paths across the grid. Match each color on the grid without crossing any paths.


Once you are finished, talk to the Green penguin and grab all of the clothing items and put them in your inventory. Then grab the Brown table and put it in your inventory. Go outside of the Gift Shop and set up the table and clothing items right under the Red flag.


Once you are finished, go to the Beach and talk to the Red penguin (Jetpack penguin) Go into the Lighthouse and click on the barrel of Cream Soda that is right next to the staircase. Add the barrel of Cream Soda to your inventory.


Now go back to the Beach and talk to the Red penguin. Give him the barrel of Cream Soda. Now, he will give you an assignment to do. You have to divide two cups of the Cream Soda into four. You can click on the help bottle for the instructions.


After the Red penguin takes off in his jetpack, go to the Dock and get some rope from the green penguin.


Then go to the Night Club and attach the rope to the metal cage and lever device. Click on the Red lever. The device will break. Go to your inventory and get out your spy phone. Click on “Tools” and take out your wrench. Unscrew the bolts by clicking on the metal panel with your wrench. Click on the inside of it and put back on all of the gears. The go in order from biggest to smallest (going from left to right).


Go to the Town from the Night Club and wait until your spy phone rings. Then go to the Dock. After Klutzy goes to the top of the Mountain, you will receive another call.


Then go to the Night Club and trap Herbert by clicking on the Red lever.
Herbert will break out. Your spy phone will then ring again.
G will call, and then all of the agents will move in.


Once Herbert is stuck to the Green penguin’s magnet, make the lights on the roof shine on the solar device.


Then he will be trapped and Gary will explain how to deal with Herbert and after which Herbert will escape using Rookie’s spy phone.


Mission 9

Club Penguin Mission 9 Spy & Seek Tutorial


1. Talk to G. Put the 3 tracking devices, the yellow duck, and the blue print on the wall into your inventory.


2. Go to the Ski Lodge. Pick up all the Find Four pieces. They are on the window seal, the stool under the phone, and under the ladder.


3. Go up the ladder. Pick up the Find Four pieces by the bricks, on the typewriter, on the table beside the phonograph, on the box, and on the box in the corner.


4. Pick up the string on the rug.


5. Go downstairs and talk to the penguins playing Find Four. Give them the pieces.


6. Go to the Forest and pick up the stick.


7. Put the sticks, the blue print, and the string together to make a kite. Put the kite on a transmitter.


8. Go to the Mountain. Put the kite and transmitter on a poll.


9. Go to the Plaza and talk to the penguins. After the puffle blows a bubble, click the gum stuck between the penguins. Take the bubble gum and put it on the yellow duck in your inventory.


10. Go to the Dock and help the penguin by pulling up the brown start handle. Then borrow the penguin’s Air Pump.


11. Put the Air pump on the duck to inflate it.


12. Go to the Ice Berg, and put the duck with the transmitter on it on the water.


13. Go to the Mine Shack. Talk to the penguin.

13. Click and drag the wooden boards, making the metal beam drop on the left side.


14. Click twice on the cart surfer cart that hass tipped over and weld all the cracks.


15. Place the transmitter in the cart. Click in the Mine for the cart to go.


16. Answer your spy phone and talk to G. Take the Binocular 3000 from G at the HQ.


14. Go to the Lodge. Click on the Gone Fishing door.


15. Go right. Look through the binoculars.

16. Go to the HQ and talk to G.


17. Go back to Herbert’s camp and place the spy phone on the Binoculars.


18. Put the spyphone/binocular in the third tree to the left.


19. Go to the HQ. Watch Herbert and Klutzy.


20. Collect your medal and receive your chocolates.

Mission 8


Firstly, talk to Gary who will brief you on the current mission. After which, Gary will tell you to go to the Dock to investigate the earthquake.


At the Dock, Herbert and Klutzy will appear from a vehicle. Apparently, they have a evil plan up their sleeves!! Herbert will accidently let go of the map of the tunnel and will be cut into half after Klutzy grabs it. The map will then fly away to other places. :o


After that, they will move back into the tunnel and you should put the lamp that Klutzy left behind, in your inventory.


Keep chasing the map that flew away starting form the Town and then the Snow Forts and finally, the Plaza. half of the map will land on the Dance Club and half will end up on a green penguin’s newspaper. Talk to the penguin and he will ask for a pizza. : D


Go to the Pizza Parlor and order the pizza the penguin asked for. Put the pizza in your inventory and give it to the green penguin with the newspaper. he will give you the newspaper which you should put back into your inventory. : )


Now go to the Coffee Shop and talk to the shopkeeper. Click the cookies on the floor to help him put back the cookies in the jar. Then get the cookie that the shopkeeper gives you and keep it.


Now go to the Gadget Room and pick up the Brown Propeller Hat behind Gary. Keep the hat.


Now go back to the Town and give the sad green puffle the Hat first, and then the cookie. The puffle will fly away and you will get another half of the map.


Now go into the huge tunnel at the Dock. Move around until you seen another two tunnels and follow the directions on the map. You will need to turn on the lamp to see in the dark. You will now be under the Gift Shop. Now use the spanner to remove the screw at the door. It will be very useful later. :D


Now go to the Lighthouse to get a box of balloons from an orange penguin and keep it. Then talk to the purple penguin to get an idea and then take a barrel of cream soda and keep it too. Then grab a net in the Lighthouse or outside the Lighthouse and put it in your inventory.


Now go to the Sport Shops and grab the box of pegs near the tent. Go back to the Gadget Room, get the Hydrogen Tank after asking Gary for permission. Lastly, get the hammer beside the spanner.


Now, take out a balloon from the box and pump it using the Hydrogen Tank and put it back in your inventory.


Then, go back to the place under the Gift Shop by going through the tunnels or from the Gift Shop, entering from the Town.


Here is a set of instructions that you need to do very quickly so please read carefully : D If you do any of these steps too slowly, you will need to start all over again. If you feel your computer is too slow, use low-quality mode!! : )


Shake the barrel by holding it and moving your mouse up and down repeatedly. Put the barrel under the Gift Shop when the barrel is close to exploding.


Then go back to the Town quickly, attach the inflated balloon to the Gift Shop, rapidly put the net under the gift shop, put the pegs on the net and use the hammer to put the pegs in place.


After you fixed the Gift Shop, the two penguins outside will be very happy and will thank you.


Now proceed to the new tunnel that has been cleared from the place under the Gift Shop. You will see the vehicle that Herbert and Klutzy drove in. Use the spanner again to remove the gear from the vehicle and keep it.


Now, move on to the Boiler Room through a hole on the left side. Talk to Herbert who will be surprised to see you, and in his fit, he will accidentally, hit the Boiler. After Gary calls you, click on the Boiler to fix it by connecting the pipes. : D


After this, Gary will call you again and you report back to the HQ. Talk to Gary and give him back the gear and he will be really happy!! : ) All you have to do now is to get your awesome medal and your gift!!


And here is a another short mission guide submitted by Khrystin!! Thanks a lot!!! : )


1. Talk to G.

2. Head to the dock.

3. When your there, talk to Herbert.

4. He shows you a map, but Klutzy accidentally cuts it.

5. After Herbert disspears, pick up the green lamp, then you must follow the map.

6. One peice of the map sticks to the Dance Club. Don’t pay attention to that one right now.

7. Follow the peice that’s still going.

8. It flys into someones newspaper. Talk to them.

9. They wish they had a pizza, so you go to the Pizza Parlor and buy them a pizza.

10. Give the pizza to them, and they will give you there newspaper.

11. Take the part of the map out of the newspaper and put it into a sepperate slot.

12. Go the Coffee Shop. Help clean up the cookies. He offers you some cookies.

13. Take a cookie, and give it to the puffle in the town. He will try to fly up and get it.

14. He falls, and they say he could fly if he had a bigger cap.

15. Grab the propeller hat behind G and give it to the puffle!

16. The puffle will then knock the second half of the map down.

17. Now you have both parts of the map. Head back to the dock and go into the cave.

18. Follow the directions on the map.

19. Unscrew the pipe that is blocking the gift shop door. (with the rench on your spy phone)

20. Get the net, balloons and soda from the lighthouse.

21. Now go to G and ask for his Hellium, and Hammer.

22. In your inventory, put the balloon on the Hellium.

23. It will put air into it. Attach it to the Gift Shop.

24. Now do the following: Put the net on the bottom of the gift shop, put the pegs into it, now hammer them in.

25. Go back into the cave, where you find Herbert in the boiler room.

26. He breaks the boiler and you must fix it.

27. G calls. You have now earned your medal and have completed the mission!

Note:right before step 25 use your wrench on the drill where the gear is if you want a gift.which is the frozen gear from the last mission.

Mission 7


When you start the mission, talk to G(Gary) first and reply that you know about the Clock being broken. Then he will request you look at the monitor and here is what you will see.


Herbert The Bear is making away with the a large gear(the Prime Gear) and that a screw has been flung into the Iceberg during the process. Subsequently, the crab makes off with the target.


When you are done with the footage, G will tell you that you are being ordered by the PSA to “improvise a solution”.


And when you asks G for more information, he tells you more facts about Herbert The Bear which are quite important and interesting. : )


Now, go to the Snow Forts to talk to Rory there and you will get lots of hints on this mission! : D


And here is the first part of the steps to the mission. You can grab a Rescue Tube at two locations. One is the Gadget Room. The other is the Sport Shop. Either way, put it in your inventory.


By the way, here is an awesome picture of the old Aqua Grabber! :o


Now go to The Dock and talk to two blue penguins wearing blue shirts. When you ask them where they got the target, they will tell you that the timid crab dropped it. Now challenge them and win the game which you got limited number of snowballs and you need to aim properly with enough strength to hit the target.


When you win, they will give you the target(which you put in your inventory), but they will be sad : ( Give them the Rescue Tube you picked up to brighten them up :D


Now to the second part of the mission. Go to the Ski Village and you will see a crying penguin. Chat with him and the pink penguin reading the news will say that Sow Fort has the best snow : D This is a major tip in the mission.


Now go to the Beach and talk to the yellow penguin relaxing on a cool chair and he will tell you about how a yellow puffle made it : )


Now pick up the green bucket on the ground near him and put it in your inventory. Then, go to the Snow Forts and use the bucket to pick up snow from the ground and put it back in your inventory. 


Next, go to Town to meet ‘Rookie’ from the last few mission. Now ask for a picture of the gear from him and put it in your inventory : )


 Later, go to the Pizza Parlor and you can pick up a music sheet near the piano. Then keep it in your inventory. While there, you might want to talk to the chef and he will tell you that the Pizzatron is not working.


For some tips to find the yellow puffle, go to the Pet Shop and ask the owner for some tips : ) Not required but very useful information. Now at the Stage, click on the piano and you will see the shy yellow puffle. 


Put the music note on the piano and play the notes from left to right. When you are done the yellow puffle  will be happy and he when you exit the piano, he will pop up : D


Give the items to the yellow puffle in the following order in the picture. Don’t mess the order up or this will happen : ) When the puffle is done with making the gear, pick it up and put it in your inventory.


Now proceed to the Gadget Room in the Secret Agent HQ. Put the gear down on the Test Chamber. Start the lever once, press the freeze button to harden it and press the lever again to bring it out : ) Put the hardened gear into your inventory again.


Now to the last part of the mission, go to the HQ and click on the locked-up Electromagnet 3000. You cannot open the lock since you do not know the password. Ask Gary and he will say the it is ‘key’ It is the code of the Secret Agent. Here is the decoded password to the lock : ) When it is unlocked, put the Electromagnet 3000 in your inventory.


Then, go to the IceBerg and use the magnet to attract the spring coil in the trapped ice cube. Again, put it in your inventory and go to the Gadget Room again. Like the gear, put the ice block on the Test Chamber, then pull the lever once, heat it with the fire button to melt the ice and press the lever again to put the spring coil back in your inventory.


Go to the Snow Forts and click the clock and assemble all the three missing things back. When you are done, Herbert the Bear will call you and tell you his plan. We can only find out in the next Mission! : )


After Gary briefs you on the next possible mission, you get rewards for your hard work, a medal and a blue shirt!! Yeah! : D


And you have completed Club Penguin’s latest mission! Congratulations!! 

Mission 6

Firstly, talk to Gary and tell him you are ready to question the crab. 
 
However halfway through, the machine would overload (or short-circuit). 


machineexplode1.png 
 
Then the crab will escape and you would have to chase after it. It will escape out of the Gadget Room, and then the PSA Headquarters and out of the Sports Shop. Then it will jump on to the Ski Lift and escape to the Mountain… :D


twopenguin.png 
 
This scene is spotted by these two penguins. If you listen to their conversations, they will talk about some funny jokes :o LOL!
*(Not required for mission!)
 
After you chase the crab to the Mountain, it will jump off it and you will have to follow it.


crabrolling.png 


During the fall, you would have lost your map. Then you just have to continue chasing the crab until it enters a cave in which you can’t enter. 
 
  
crabescape.png 


After which, you explore the terrain to find this black puffle that appeared in Mission 2 before. 
 
 blackpuffle.png
 
 
Look around the place to find this.
 
 
puffleo.png 
 
 
Use the scissors from your Spy Phone to cut the string. Put the bag of Puffle-O into your inventory. Go back to the tree stump where the black puffle is and feed him with a Puffle-O. He will then follow you wherever you go. ;D
 
Go back to the cave where the crab went into. Throw a Puffle-O at the door flap that the crab went through. The helpful guy will help you open the door and you can enter.
 
Once you enter, you will be trapped in a cage instantly. A bear called Herbert appears and tell you his story with a really cool flipchart. his dream and how he came here on an iceberg and how the crab called Klutzy saved him…
 

bearname.png 
 
Anyway, he’s going to use his machine to destroy the Ski Lodge and make a huge bonfire to keep himself warm. He will leave with the crab and you would have to escape out of the cage first.
 
 Put Puffle-O at the positions stated in this image and you should be able to get out.
 
 
puffleoposition.png 
 
These are the things you will have to put in your inventory…
 
 
hook.png 
 
 
moreitems.png 
 
Combine the items as follows.
 
  original.png    =>      combined.png
 
 
Here’s a map on his targets… 
 
 
map.png 
 
When you try to open the door to get out, a pile of snow will block your path so you should feed the puffle the Spicy Puffle-O to burn off the snow.
 

hotpuffleo.png 
 
 
Use the grappling hook to climb the Mountain.
 
mountain.png 
 
 
After which, you should go into the Ski Loge and go to this place.


gonefishing.png
 
 
Click on Herbert the Bear, who is repairing the machine and he would say that he wants a Seaweed Pizza.
 
 
seaweed.png


Here is the path to the Pizza Parlor.
 
 
a1.png
 

a2.png
 
 
a3.png


a4.png 


Go to the Pizza Parlor and order a Seaweed Pizza. Be careful not to get the wrong one!
 
 Put the pizza in your inventory.
 
pizzapenguin1.png 


 Then, go back the path you came from and give the pizza to Herbert the Bear. While he is eating the pizza, turn the lever the other way.
 

givepizzatobear.png


When he is done with the pizza, something will happen to him (find out on your own) :D


Then Gary will come along and you will receive a call from the Bear.


phonecall.png 
 
 
Well, that was a scary phone call… hand over the blueprint to Gary and your mission is complete! : )
 
 
 getaward.png
 
 
Whoa, I took one hour to make this post. If you are using it on your site, please give me credit by linking to my site. Thanks!
 
Likewise, if you think that my mission guides are the best, visit my site more often! :)
 
 
Have fun
Make a Free Website with Yola.